#hc-sr04_distance_meter2
유효거리 밖에서 ERROR표시 유효거리 내에서는 0.000
dist!=0일때 거리 측정, dist = 0일때 ERROR 표시
#include <LiquidCrystal_PCF8574.h>
#include <Wire.h>
/*set the LCD address to 0x27 for a 16 chars and 2 line display */
LiquidCrystal_PCF8574 lcd(0x27);

const int pinSW = 2;
const int pinTrig = 4;
const int pinEcho = 5;

const int bounce_time = 160;

void setup(){
pinMode(pinSW,INPUT_PULLUP);
pinMode(pinTrig,OUTPUT);
pinMode(pinEcho,INPUT);

Serial.begin(9600);
Serial.println("measure distance with HC-SR04");

int error;
Wire.begin();
Wire.beginTransmission(0x27);
error = Wire.endTransmission();

if(error == 0){
	Serial.println(": LCD found.");
    lcd.begin(16,2);
}
else
    Serial.println(": LCD not found.");
    init_lcd();
}

void loop(){
if(digitalRead(pinSW) != HIGH){
	delay(bounce_time);

if(digitalRead(pinSW) != HIGH){
	int dist = get_dist();

    if(dist != 0){
    	print_dist(dist);
        }
    else{
    	print_error();
        }
    }
    }
}

void trig(void){
	digitalWrite(pinTrig, HIGH);
    delayMicroseconds(10);
    digitalWrite(pinTrig, LOW);
    }

unsigned long get_echoTime(void){
	unsigned long echoTime = 0;
    while(digitalRead(pinEcho) == LOW);
    unsigned long startTime = micors();
    while(digitalRead(pinEcho) == HIGH);
    echoTIme = micros() - startTime;
    /*
    17 * 240 / 100 = 40.8(mm), 17 * 23000 / 100 = 3910(mm)
    */
    if(echoTIme >= 240 && echoTime <= 23000)
    	return echoTime;
   	else
    	return 0;
}

int get_dist(void){
	trig(); /*transmit trigger pulse*/
    unsigned long echo_time = get_echoTime();
    if(echo_time != 0){
    /*
    340(m) / 1(sec) = 2 * distance(mm) / echo_time(us)
    340,000(mm) / 1,000,000(us) = 2 * distance(mm) / echo_time(us)
    2,000,000 * distance = 340,000 * echo_time
    distance = 340,000 * echo_time / 2,000,000
    = 17 * echo_time / 100
    */
    unsigned long distance = 17 * echo_time / 100;
    return distance;
    }
    else
    	return 0;
}

void init_lcd(void){
	lcd.setBacklight(255);
    lcd.home();
    lcd.clear();
    lcd.print("<Distance Meter>");
    lcd.setCursor(0,1);
    /*         0123456789012345 */
    lcd.print("dist =       (m)");
}

void print_dist(int mm){
	lcd.setCursor(7, 1);
    /*	0123456789012345
    	dist = 3.912 (m)
    */
    lcd.print("      ");
    lcd.setCursor(7, 1);
    lcd.print(mm / 1000);
    lcd.print(".");
    lcd.print(mm % 1000 % 1000); //3자리.1000으로 나눈 나머지.
    lcd.print(" (m)");
}

void print_error(void){
	lcd.setCursor(7, 1);
    /*
    0123456789012345
    dist = ERROR (m)
    */
 	lcd.print("      ");
    lcd.setCursor(7, 1);
    lcd.print("ERROR");
}
#hc-sr04_obstacle_detector
pulse in 사용해서 간단하게 구하기
double로 부동소수점 활용하기

#include <LiquidCrystal_PCF8574.h>
#include <Wire.h>
/* set the LCD address to 0x27 for a 16 chars and 2 line display */
LiquidCrystal_PCF8574 lcd(0x27);

const int frequancy = 523;

void setup(){
	pinMode(pinTrig, OUTPUT);
    pinMode(pinEcho, INPUT);

    Serial.begin(9600);
    Serial.println("HC-SR04 obstacle detector.");

    int error;
    Wire.begin();
    Wire.beginTransmission(0x27);
    error = Wire.endTransmission();

    if(error == 0){
    	Serial.println(": LCD found.");
        lcd.begin(16, 2);
        }
    else
        Serial.println(": LCD not found.");
        init_lcd();
  }

  void loop(){
  	digitalWrite(pinTrig, HIGH);
    delayMicroseconds(10);
    digitalWrite(pinTrig, LOW);

    unsigned long duration = pulseIn(pinEcho, HIGH);
    double distance = ((17. * duration) / 1000); //결과가 실수->double로 받아주기

    lcd.setCursor(7,1);

    if((int)distance/100 == 0){
    	if((int)distance/10 == 0) lcd.print("  ");
        else lcd.print(" ");
  }

  lcd.print(distance);
  lcd.print(" cm");

  if (distance < 40) alarm (100, 25);
  else if (distance < 60) alarm (150, 50);
  else if (distance < 80) alarm (200, 100);
  else if (distance < 100) alarm (250, 200);
  else;
  /*
  Serial.print(distance / 10);
  Serial.print(".");
  Serial.print(distance % 10);
  //Serial.print(distance);
  Serial.println("cm");
  */
  //delay(500);
  }

  void init_lcd(void){
  	lcd.setBacklight(255);
    lcd.home();
    lcd.clear();
    lcd.print("<Distance Meter>");
    lcd.setCursor(0, 1);
    lcd.print("dist =       (m)");
 }

 void print_dist(int mm){
 	lcd.setCursor(7, 1);
    /*
    0123456789012345
    dist = 3.912 (m)
    */
    lcd.print("      ");
    lcd.setCursor(7, 1);
    lcd.print(mm / 1000);
    lcd.print(".");
    lcd.print(mm % 1000 % 1000);
    lcd.print(" (m)");
}

void alarm(byte on, byte off){
	tone(pinBuzz, frequancy);
    delay(on);
    noTone(pinBuzz);
    delay(off);
}
#웹서버로 아두이노 제어하기
HTML : Hyper Text Markup Language로 인터프리터 언어로서 웹브라우저에 의해 컴파일됩니다.
현재 자주 사용하는 브라우저는 chrome 기반 입니다.
#notepad ++ v6.7.5
다른 버전의 경우 ftp 플러그인을 설치해주어야합니다.
ftp 플러그인이 포함되어있는 마지막 버전인 notepad ++ v6.7.5을 다운로드 해줍니다.
#Mean 스택과 자바스크립트 언어.
mean 스택 :
M Mongo db
E Express.js
A Angular.js
N Node.js
현재 사용되는 언어의 추세는 자바스크립트 기반으로 생산성이 높습니다.
여기서 자바스크립트란! Google에서 개발된 java script engine 개발로 독립적인 프로그래밍 언어입니다.
#jQuery
$().attr(); == jquery().attr();
# == id == class
HOW TO USE?!
1 - 직접 다운로드 하여 추가하기 제이쿼리 다운로드 주소
다운로드 후 <script src="경로/jquery-3.4.1.min.js"></script> 입력하기
2 - cdn 사용하기 (주소로 추가하기)
#node.js
강력한 js 등장으로 인해 등장한 js 언어
- LTS 버전 설치
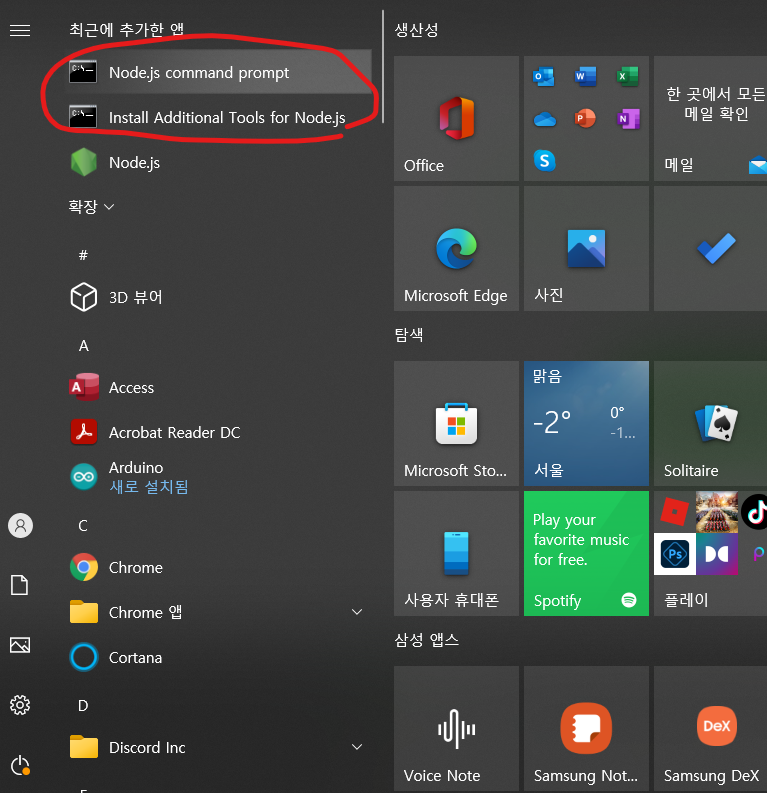
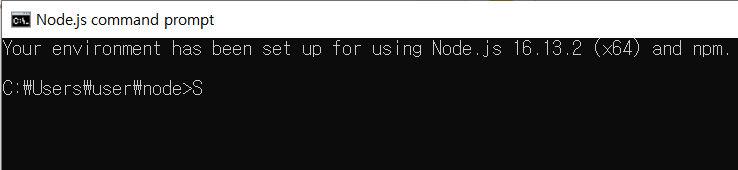
#Node.js command prompt
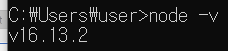
node js 설치 확인 : node -v
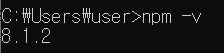
npm 설치 확인 : npm -v
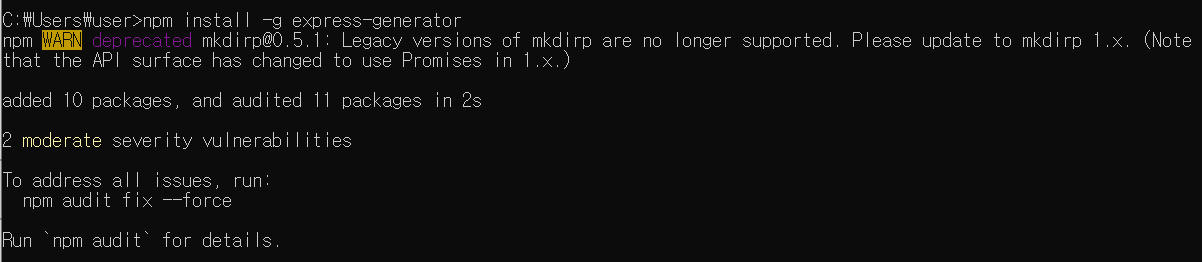
Express.js 설치 :
npm install -g(global) express
npm install -g express -generator
*Express는 없어도 실행가능하지만 있으면 기본적인 프로젝트 구조를 생성해줘서 사용이 편리하다.
#npm
node.js의 코드는 비동기 콜백 방식이다!
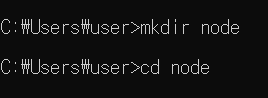
#node 파일 생성
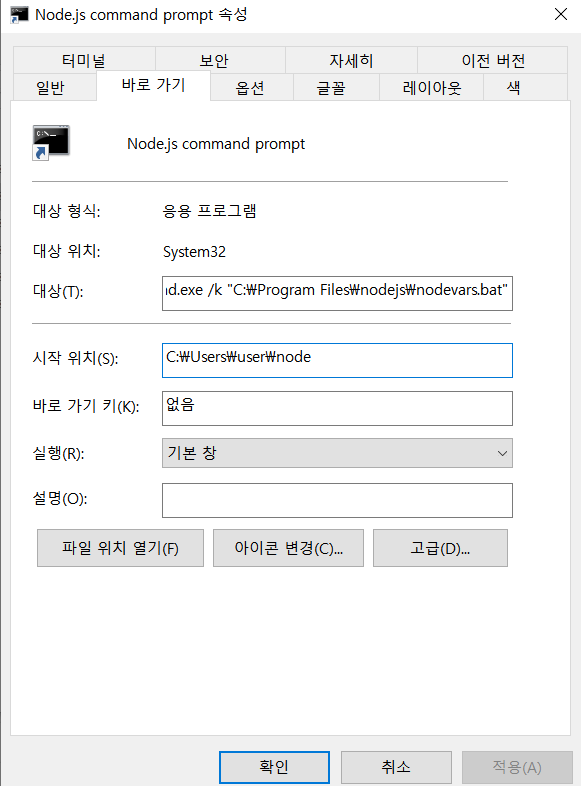
#node command prompt
속성 - 시작위치 변경 :
C:\Users\user\node
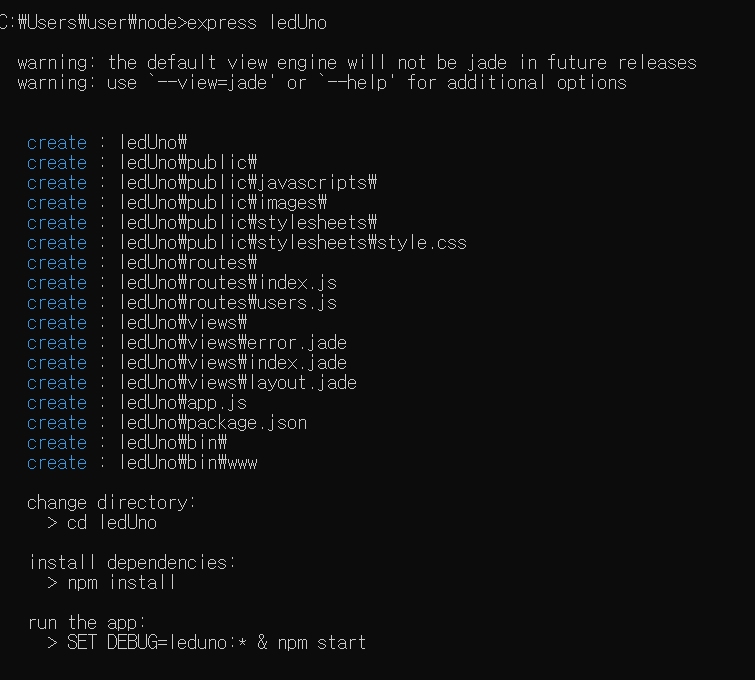
#express -만들 파일명
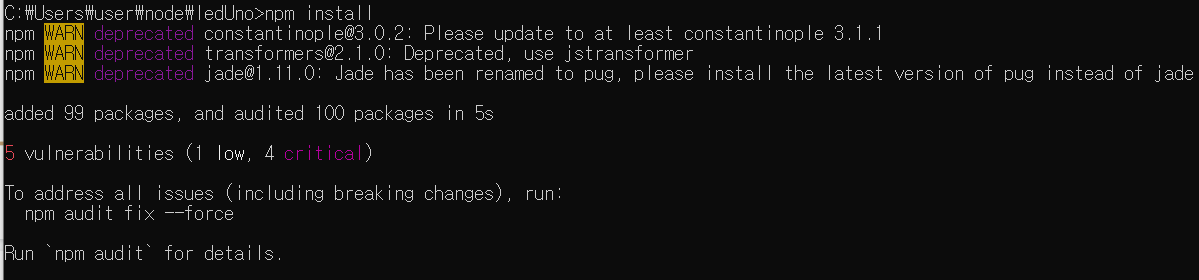
#npm install
기존 의존성 설치해주기.
예를 들어 c라는 어플리케이션이 a와 b에 의존성을 가지고 있다면
a와 b도 설치해줄지 물어본후 a,b,c 모두 설치해주는것!
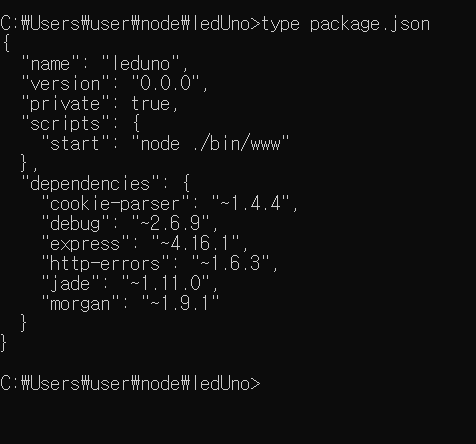
#type package.json
npm install로 한번에 설치가 된것을 확인할 수 있습니다.
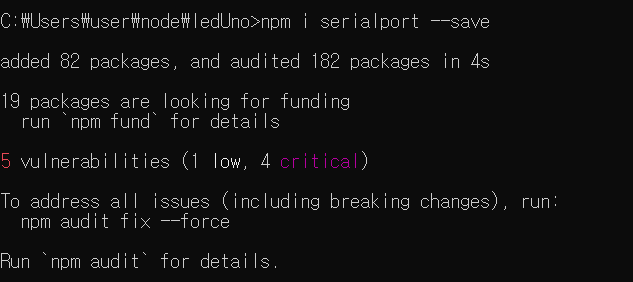
#npm i serialport - - save
#arduino_web_control-main에서 public이랑 app.js 복사해서 node파일로 복사
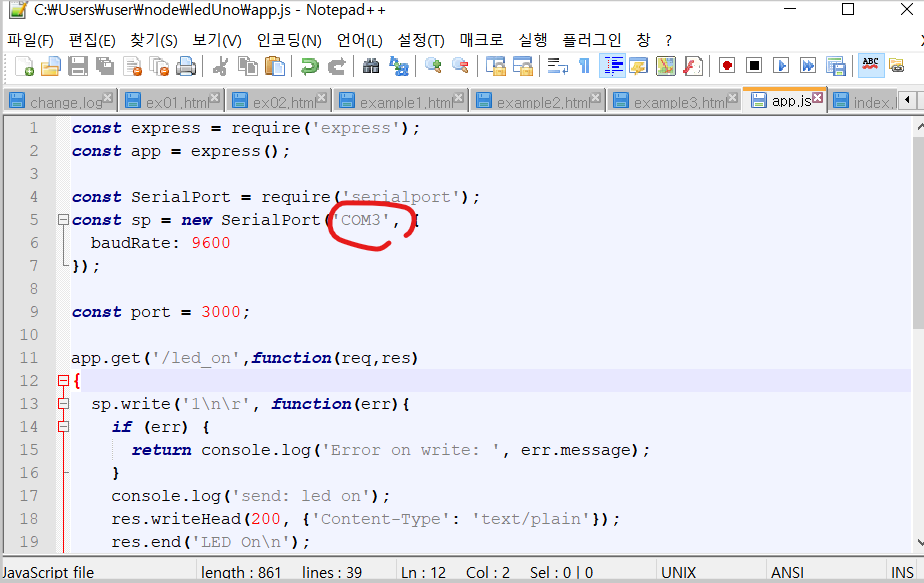
app.js에서 serialport:보드port로 바꿔주기
#node.app.js실행 : C:\Users\user\node\ledUno>node app.js
결과값이 listening on *:3000이 나온다면 서버에서 잘 실행되고 있는것!

#app.get -> express에서 지원.
const express = require('express');
const app = express();

const SerialPort = require('serialport');
const sp = new SerialPort('COM3',{
baudRate:9600
});

const port = 3000;

app.get('/led_on', function(req,res)
{
sp.write('1\n\r', funciton(err){
	if(err){
    	return console.log('Error on Write:'
        ,err.message);
        }
        console.log('send:led on');
        res.writeHead(200, {'Content-Type':'text/plain'});
        res.end('LED On\n');//
        });
	});

app.get('led_off', function(req,res) // '/'면 앞에 주소는 남기고 뒤에 따라 붙음
{
sp.write('0\n\r', funciton(err){
	if(err){
    	return console.log('Error on Wirte:',err.message);
        }
        console.log('send:led off');
        res.wirteHead(200, {'Content-Type':'text/plain'});
        res.end('LED off\n');
        });
     });

app.use(express.static(_dirname + '/public'));

app.listen(port, function(){
	console.log('listening on*:'+port);
    });
const는 상수형 변수를 선언하는 것으로 한번 정의후 바꾸지 않는 변수. 리소스를 더 많이 정의할수 있다.
#포트
포트번호 : ftp 21 tellnet 23 http 80
공유기 입장에서 할당한 주소는 외부에서는 알 수 없고, 공유기의 WAN포트(Wide Area Network)의 주소만 알수 있음.
IP 주소는 고정이 가능하지만 추가 요금이 필요하고 우리는 주로 유동 IP로 인터넷 모뎀을 껐다키면 IP주소가 바뀜.
외부에서 IP를 알면 공유기 접속이 가능하다.
FTP 서버도 주소가 같아서 포트포워딩이 가능하다.
#도메인
ping google시 142.250.204.110
도메인 서비스 제공서버(DNS)는 모든 IP 주소와 1대 1로 대응하는 도메인 name을 모두 가지고 있다.
도메인을 새 IP에 연결하면 고정IP인 경우 컴퓨터 접근이 가능하다.
IP TIME 공유기의 경우 DDNS(Dynamic Domain Service)를 제공해주는데 이를 통해 IP가 바뀌어도 추적해서 접근이 가능해진다.
#HTTP 응답상태 코드.
https://developer.mozilla.org/ko/docs/Web/HTTP/Status 참고.
#Serial Port

https://github.com/greattoe/arduino_web_control
GitHub - greattoe/arduino_web_control: Web Control LED on Arduino with node.js
Web Control LED on Arduino with node.js. Contribute to greattoe/arduino_web_control development by creating an account on GitHub.
github.com
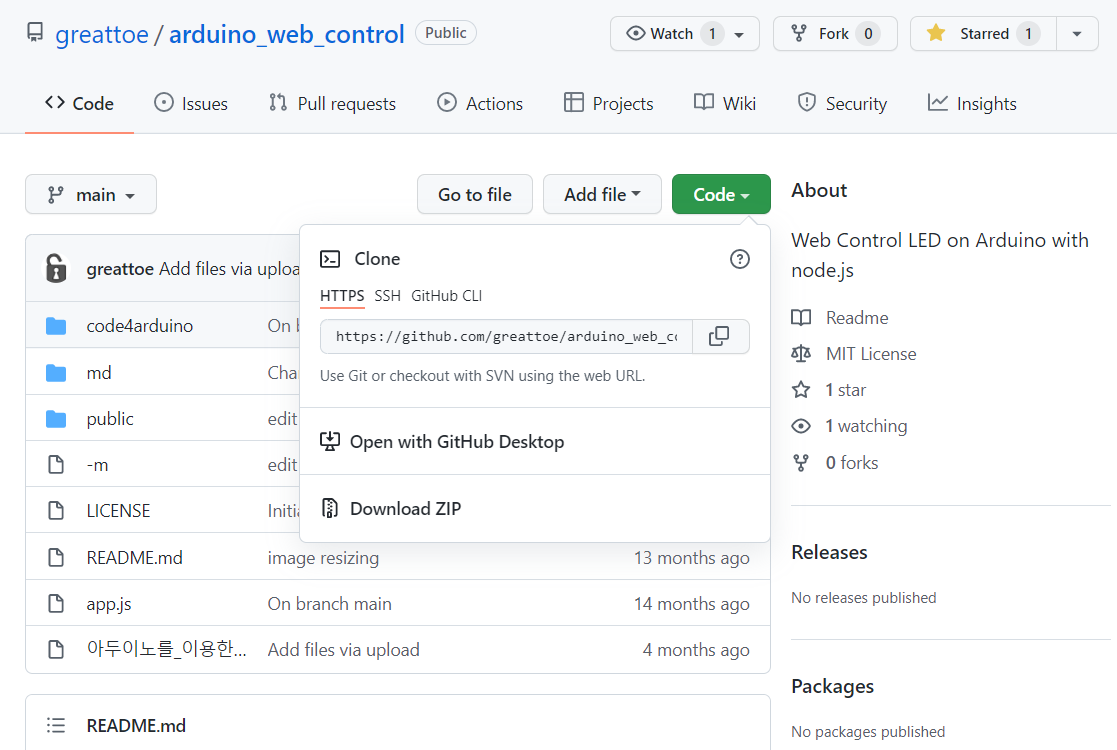
Download ZIP
node - public html 1,2,3을 public으로 가져와 index.html 파일 바꾸기
localhost:3000으로 접속해서 코드 실행
#Version 1 : 글로만 켰다가 끄기
#Version 2 : 이미지로 켰다가 끄기
#version 3 : 음성인식으로 켰다가 끄기(오픈소스 annyang 사용)
autoRestart : 계속해서 음성인식 및 실행 가능할수있도록!responsivevoice
#웹사이트에서 가변저항값 출력하기 : pot
express pot
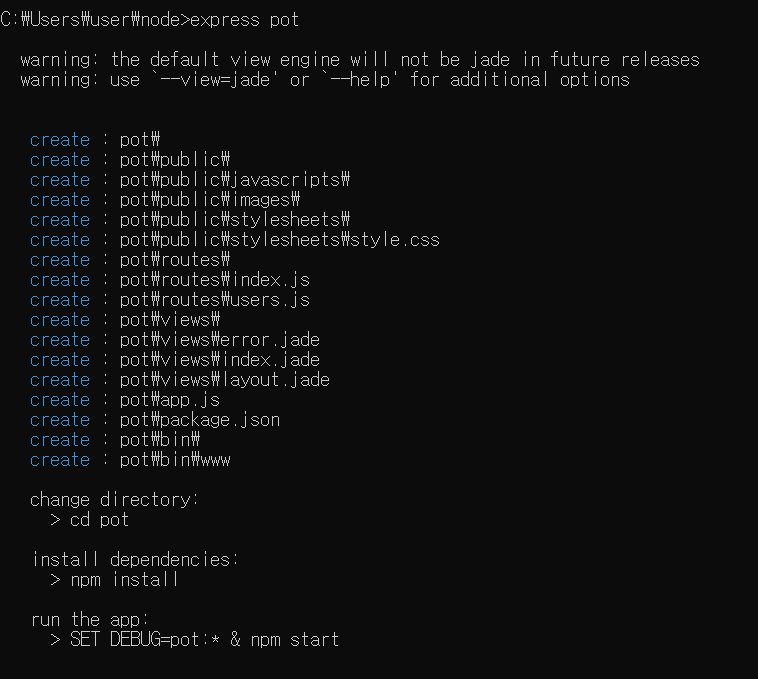
다운로드한 pot 폴더에서 public, app.js 파일 복사해서 node pot 폴더에 옮기기
#시리얼 포트 현재 사용하는 포트로 변경!
var sp = new SerialPort('COM3',{ baudRate:9600 });
#arduino 파일에서 potPin 코드 변경.
기존 파일의 A6에서 해당하는 보드의 핀번호로 바꿔주기
const unsigned int potPin = A0;
#cd pot

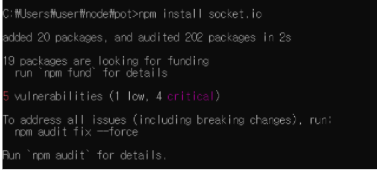
#npm install

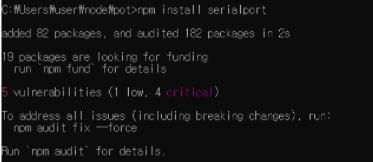
#npm install serialport
#npm install socket.io
#node app.js

c언어 header include
node, java 모듈 import
#express.static
public 폴더안에 index.html 파일이 있다
index가 아닌 이름으로는 구동이 되지 않는다.
하위경로에 public이 있어야 함.
app.get
app.use
app.listen=>웹서버 구동
수신없이 전송만 하면 socket.io 필요없지만 반대의 경우 socket.io를 써줘야 한다.
.on은 임베디드에서는 인터럽트, pc에서는 이벤트를 일으킨다!
#참고자료:
ResponsiveVoice Text To Speech - ResponsiveVoice.JS Text to Speech
강의자료(for Lesson), 임베디드시스템.. : 네이버블로그 (naver.com)
greattoe/arduino_web_control: Web Control LED on Arduino with node.js (github.com)
annyang! Easily add speech recognition to your site (talater.com)
'Lobo's study room > 아두이노' 카테고리의 다른 글
| 블루투스 모듈과 조도센서 (0) | 2022.02.09 |
|---|---|
| [미니프로젝트] Aduino Security Camera (0) | 2022.01.26 |
| 아두이노 우노와 부저모듈, lcd, 초음파 센서 다루기. (0) | 2022.01.22 |
| 아두이노 택트스위치와 가변저항사용하기 (0) | 2022.01.19 |
| 오픈소스와 IOT. 아두이노와 택트스위치 연동하기. (0) | 2022.01.17 |


